
In House Notary (IHN) Profile Setup
You can set up an In House Notary account in the Fairfax environment in order to perform an end-to-end workflow for testing. The following steps will walk you through this setup and how to perform an end-to-end test.
In House Notary Setup
Before beginning, ensure that your Customer Success Manager has turned on In House Notaries for your organization in Fairfax. Once turned on, your organization admin can invite a notary by going to Team Members > Invite New > and selecting "Yes" for "Will this person notarize documents?". Select Virginia for the state. Since this is just a test notary account, you can send the invite to whichever email you'd like to create the notary account for.
Find the invitation in your email inbox and begin the sign up process, following the steps below.
Personal Info Tab
- First Name: Any First Name
- Last Name: Any Last Name
- Email: Email of whoever will use the test notary account
- Phone Number: 4049848984
- Address: 123 Proof Street, Fairfax, VA 22030
- Time Zone: Any Time Zone
- Are you a licensed attorney?: No
Commission Details
-
Commission Number: [Your company name] - [Last 5 digits of your phone number]
-
Example: Proof - 12345
-
Commisson Expiration Date: Any Future Date
-
Upload a copy of your traditional commission: Use this document
Insurance Details
- E&O Insurance Provider: Passel Ins
- Insurance Amount: 54321
- Policy Expiration Date: January 1, 2026
- Upload a copy of your E&O Policy: Use this document
Digital Certificate (Legacy)
Proof Certificates
Notary accounts created after May 1st, 2024 will be onboarded using an automatically issued digital certificate. Please see "Verify Identity" below for next steps on how to obtain your digital certificate if you are using a newly created notary account.
- Upload IdenTrust signing certificate: use this certificate
- Digital Certificate Password when prompted: meowmix
Signature and Seal
-
Create Signature
-
Upload this image
-
Create Initials
-
Upload this image
-
Create Seal: Choose Confirm and Apply
Verify Identity
Notary accounts created after May 1st, 2024 will be issued a Proof Digital Certificate during onboarding. Notaries are required go through an additional identity verification step. Please use the following details for the Verify Identity step:
- Click "Begin Identification"
- Click "Sign now"
- Enter your phone number to perform multifactor authentication. Once you receive the message, enter the six digit code.
- Enter any date of birth.
- Address: 123 Proof Street, Fairfax, Virgina 22033, United States
- Check the box 'Use this device' and select 'Accept and continue'
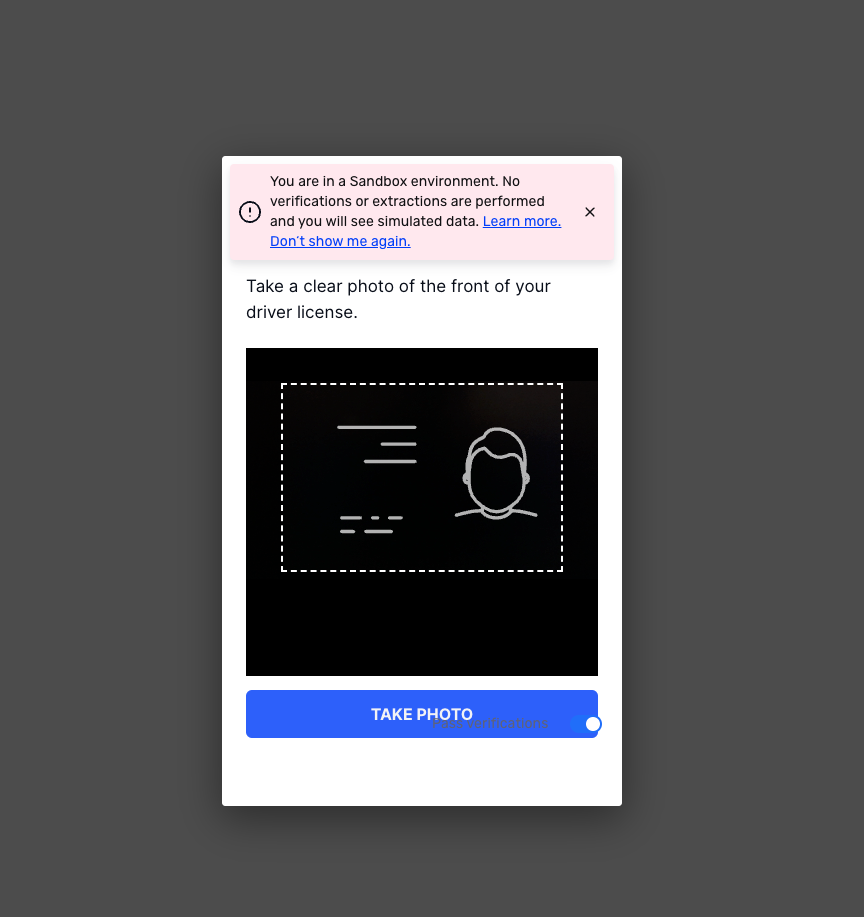
- Select US Driver's License and US Passport for the Government Issued ID and Supplemental Document

- Capture any image using your webcam - ID verifications are not performed in lower environments. Ensure the "Pass verifications" toggle is enabled on the bottom right. Repeat for the remaining three ID image capture prompts.
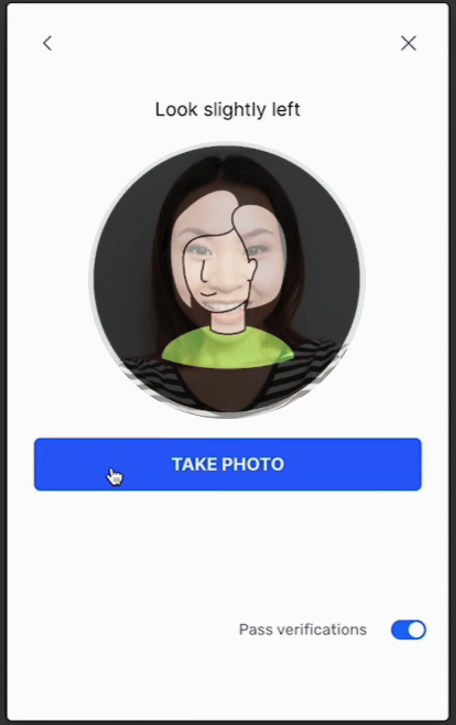
- The last step of the identity verification process is a selfie verification. As with ID images, your selfie will not be verified and you can capture any image with your webcam. Once the camera capture is open, simply wait for the button to update to Take Photo. Repeat for the remaining image captures.
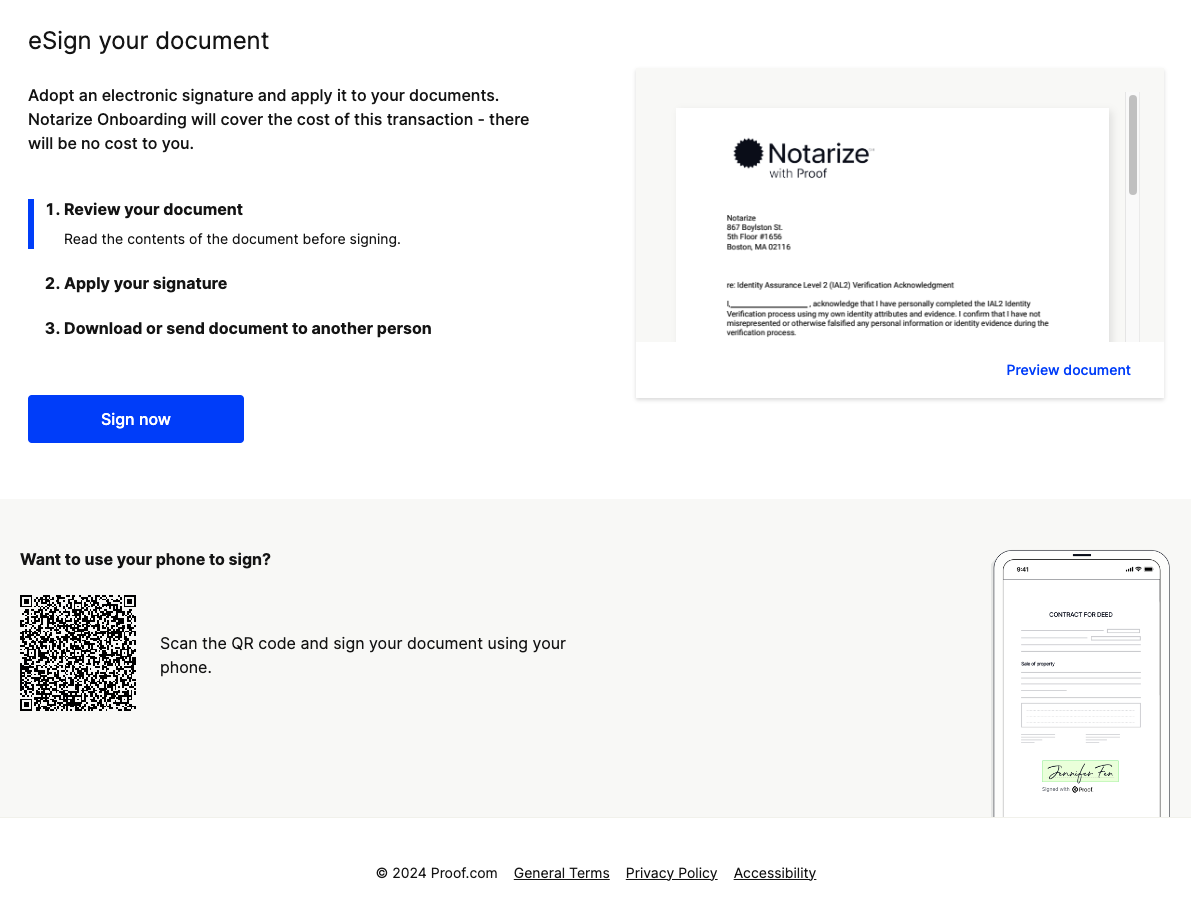
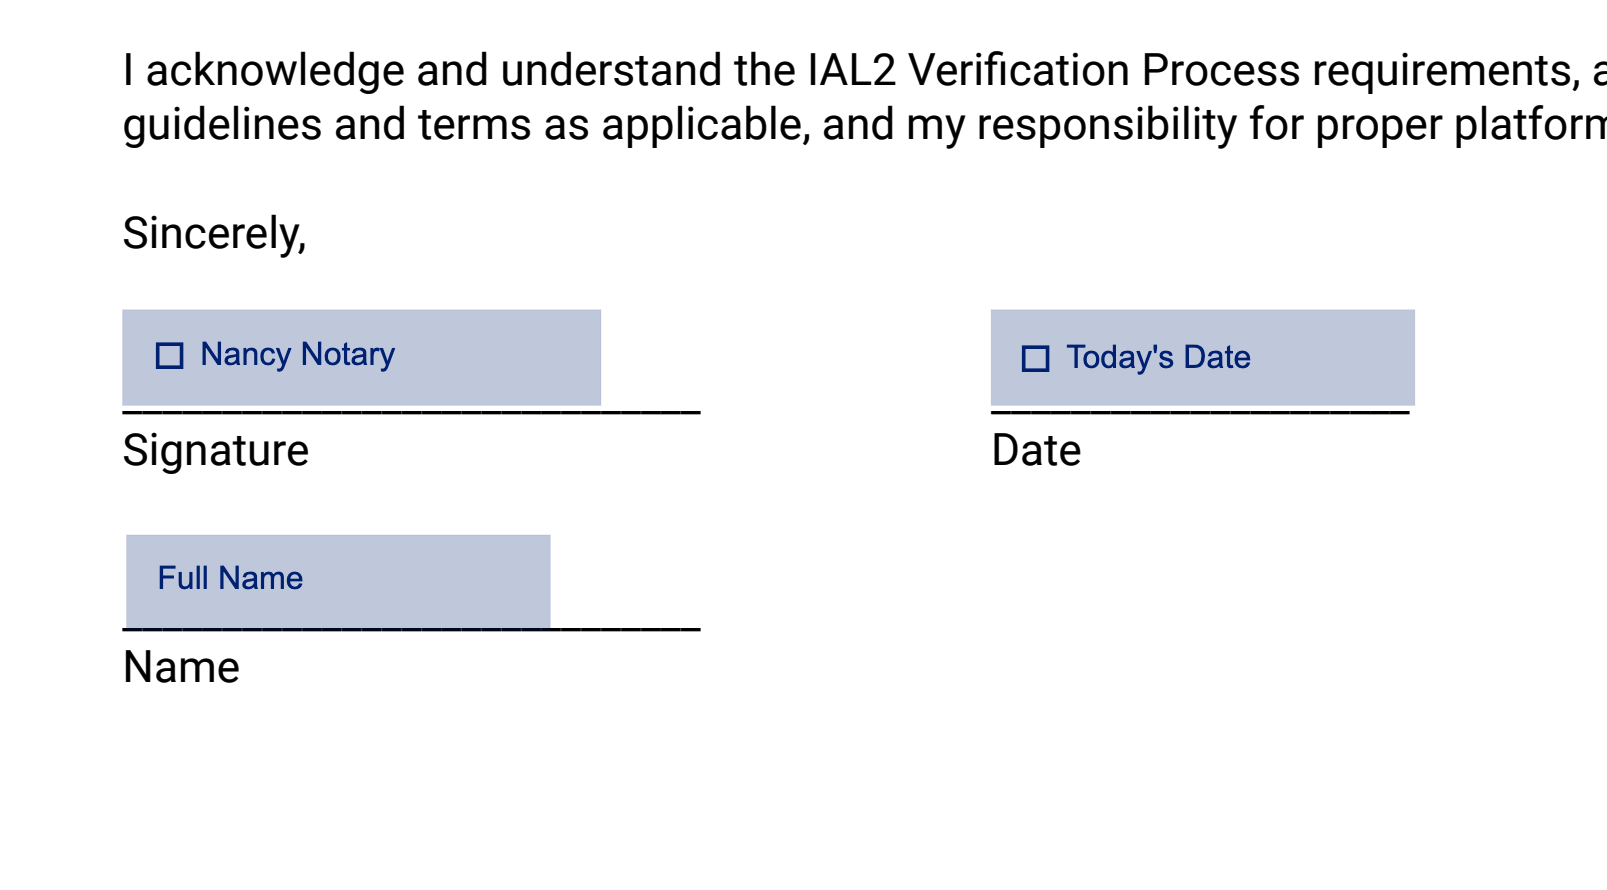
- Complete the eSignature document presented, click all designations to fill them and click Complete Signing on the bottom right of the screen.
Proof Certificate
- Enter 1235 for the backup verification pin.
- Select Next.
Finishing Up
Once you've completed the steps above, reach out to your Customer Success Manager to get your new test Notary account approved and activated.
Updated 1 day ago